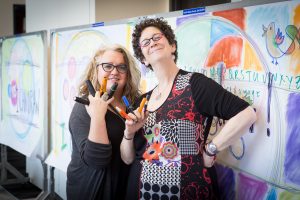
 The fabulous Tracy Kelly of BC Campus invited me north to Vancouver to co-facilitate two workshops, one on graphic facilitation in higher education (“VizEd“), and the second a larger team collaborative Liberating Structures 2 day immersion workshop. In keeping with my debrief/reflection practice, here are my lessons from the sold-out GF workshop.
First, it was a joy to collaborate with Tracy. She has the domain skills and expertise and organizing mojo as icing on the cake. She attracts fun and interesting people to her BCCampus offering and she is has a deep sense of fun and playfulness. The whole package. So saying “yes” to Tracy is easy peasy.
The registration information gave a clear snapshot of the day’s plan:
Join us for a hands-on, full-on day of exploring the opportunities and practices of bringing hand made visuals into our teaching and learning. (P.S. “handmade” can mean electronic too!)
We will warm up with some exercises to banish our inner critics, then explore practices for going visual in our work. Bring your challenges! Bring your ideas! Bring your inner learner, your inner teacher and your inner child as we explore visual practices together.
What you can expect:
- Tips and practice for basic drawing skills (Courage! Confidence! Color!)
- Examples of visual exercises and activities, and where they might be useful in your work in higher education
- Explore templates for collaborative visual meaning making
- Experiment with the intersection of group process and visuals
THERE ARE NO “ARTIST” PRE-REQUISITES!
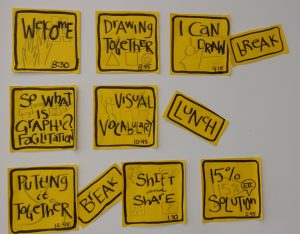 What we Planned
We iterated our agenda and then whipped it into final shape the night before. There were so many elements we wanted to include, but had only one day! We pulled exercises from both of our practices. It was interesting to see where we had developed different versions of similar exercises. So we riffed and improvised across our two practices.
The basic building blocks included an visual self introduction using the Liberating Structures Drawing Together, my ever-ever-ever-beautiful favorite “I Can Draw” exercise I learned at an IFVP gathering in New Mexico years ago, a brief exposition of what comprises graphic facilitation, development of the elements of a visual vocabulary, and ways to put it together through space organization, templates and metaphors.
To put this together, we planned to give an overview of sketchnoting, then have them sketchnote/graphically record Tracy interviewing Jason Toal and I. Jason is another fab visual practitioner from SFU.
Then we planned to break into small participant driven groups to Shift and Share around four topics before identifying personal next steps and do a River of Life for evaluation. (Visual agenda on your right!)
What Happened
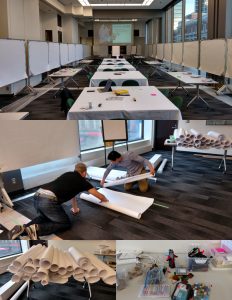 We had only an hour to set up the room, so we were blessed by a team of helpers who helped transform the pin boards into paper-covered drawing boards. Never underestimate the labor (or for my Canadian friends, labour!) it takes to set up the room for a graphic facilitation workshop! We had packets with pens, pastels, eraser, pencil, “boo boo labels” and a few other things ready for everyone. People like their goodie bags!
The drawing practice itself is very physical and I’ve learned to encourage people to take care of their bodies right off. I am beginning to work more with communities comprised of people with very different physical and mental abilities. There is a lot I have to learn about useful accommodation.
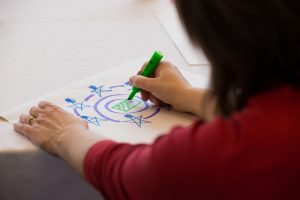
We had 26 people from various parts of the higher education ecosystem (with just a few classroom teachers). It was a quiet but fearless group. They stepped into every invitation, even at moments of “confusiasm.” They jumped into the self portrait with five simple shapes and used that as a basis for peer self introductions as we got to know each other.
The “I Can Draw” is always a visual feast of color and beauty. That we can fill up a room in 30 minutes with such a visual richness never fails to stun me. So often people walk in with that “but I can’t draw” voice sitting on one shoulder, so this exercise is about freeing oneself of that voice.
We sprinkled some slides with some exposition about visual facilitation practices, mostly to situate the simple drawing practices into areas of application. In the higher education context, there are so many opportunities, from visual planning, visual engagement in the classroom, and visuals for constructing and sharing ideas and information. The main point was that we can incorporate visuals in so many places: we just need to remember to THINK about it!
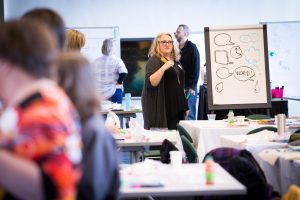
Tracy had a great version of the “how to draw basic shapes and icons” that I had not experienced before. Everyone started Round 1 at a blank canvas of large paper. We’d demo shapes and icons, they would practice, and we’d step back and look at each others work for inspiration. Supporting these rounds of drawing were resources on the table – various sets of icon cards to peruse and practice, depending on the relevance of an icon to a particular person’s work.
Then they would rotate to the canvas to their right for the second round. So instead of just working on “their” piece of paper, they were working on top of each other’s work. We debriefed not only the drawing, but this experience of layering our work. The rounds included:
- Round 1 – circles & spirals with icons that include light bulbs, globes, spiral arrows, balloons, etc
- Round 2 = squares, stars, triangles and arrows with icons like computers, phones, buildings, documents, books, barriers, wrenches
- Round 3 = people – including star people, stick folks, bean people, spring people, and basic face structures to show a range of emotions. Here we also talked about the cultural implications of how we drew and used color for people.
I liked this better than my version, which was to go from shapes, to people, to arrows and frames and finally to icons for two reason. The groupings helped break things into bite-sized pieces, and it accomplished the “writing over each others work” that I usually do in a separate exercise. So when time is tight, you get “two for one!”
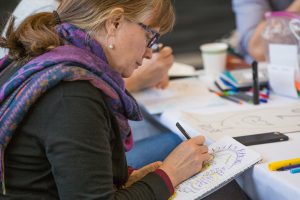
After lunch we gave a few more examples of how to unify and organize visual elements with frames, templates, layouts and metaphors. (Tracy introduced the term “grounds” for these things!) This warmed them up for their sketchnoting/graphic recording practice. Tracy again came up with a great idea for listening and capture practice with “VizEd Radio.” She had a set of domain related questions for Jason and I while people madly sketched, followed by a reflection on what it felt like to try and visually capture a conversation. For me it was great to listen to Jason’s reflection on his practice, and where we had similar and different experiences — important for seeing the diversity of this practice.
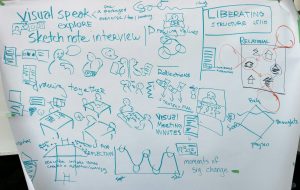 During the course of the day people had asked about specific elements of visual facilitation. Our Shift and Share session provided the chance to identify four of these areas for short, collaborative learning huddles. People could spend 15 minutes in each area, getting a taste, or hang out at one for the full hour. The four stations included digital recording, designing visual supports for specific facilitation practices, visuals and the classroom and more on templates and layouts! I regret we did not do any good capture of these sessions. I think we all got lost in the interesting conversations and demonstrations. The photo above is all that remains. Harvest fail!
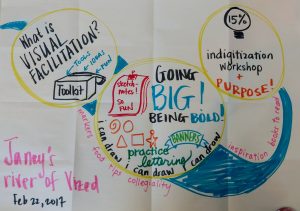 Finally, we asked people to think about how they would apply their new found/enhanced visual skills when they headed back to their classrooms and offices combined with a short visual reflection of their day. We used River of Life, where you visually draw a river, left to right. The upper left is the past: what you wanted out of or anticipated about the workshop, the middle is the present: what you learned, and the upper right is
 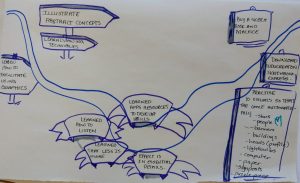 the future – your next step in using the skills. You can see some samples of the Rivers here: https://goo.gl/photos/iaLHerqP3ZS1K3RBA. We also offered a small visual grid on the way out where they could leave impressions – but I think by then we had fully exhausted everyone!
What We Learned
Here are a few snippets from the evaluation:
- 85% of respondents said it was a high quality learning experience and 93.8% said they can apply what they learned to their work.
- I enjoyed being challenged to approach what I normally do in a new way.
- The facilitators created a safe environment for us to try out new ideas. Plus it was just plain fun to get out of the office and do something I have never done before.
- I learned so much about some of the basics of visual practice that I feel confident learning more on my own now. That is important! and I also gained confidence in drawing…I learned to let go of the critic and just practice. Okay, the critic is still there and hasn’t been let go of but is quieter.
- I learned a lot – both how to draw things and how to use the things I draw
We had some moments of dissonance as well. Some felt the afternoon was not as well structured as the morning. And of course, some loved the food, some did not. THAT is not a problem I have ever been able to solve!
In the mean time Tracy and I have been exchanging our personal reflections via email.
Nancy:
- I continue to be invited into fabulous collaborations every time I co-facilitate a graphic facilitation workshop. From Michelle Laurie for our RosViz workshops, to Tracy I am just damn lucky.
- Yes, you can do a workshop with results in one day. I used to think we really needed two days which feels like a luxury these days with people so busy and short of time and resources. With each iteration the agenda gets sharper.
- USE the darn visual agenda (it was at the far end of a long room… I should have positioned it better)
- Don’t overpack the agenda. As I’ve mentioned in other blog posts, I’ll be learning this the rest of my life, but I think we exercised appropriate restraint.
- Work hard, hard, hard to reinforce each specific idea for application. In all the hullabaloo, this is so easy to lose.
- Get clearer in how I express some of the fundamental ideas. I do get lost in my own obscure jargon. Argh!
- I need to practice my own drawing more, but I remained convinced that my imperfection is an invitation not a straight up weakness! 🙂
- Have good food. THANK YOU BCCampus!!!
Tracy:
- My VizEd course/practice is expanding from a very heavy leaning into graphic recording into broader Viz practices, with specific hooks for supporting education and organization processes. In the future, I will continue to include more smaller scale work than I have done before (bonus: less paper) and give a bit more air time and encouragement for sketch notes. This means my sketch note practice needs to improve too.
- I still feel like end of day harvest/how we end isn’t what I want it to be (though I confess I love that I have my “river” from taking your course to look back on). When I do this course solo, we finish by doing our first large scale GR and gallery walk, which is like “yay” and “omg look at it all! we did it!” I like that vibe to launch them OUT the door. But it may not be the most useful for all people, will continue to give thought… (Nancy nods in agreement.)
Photos: https://goo.gl/photos/giyTDeXPxAk2KF3R8 (mine) and those of BCCampus https://www.flickr.com/photos/61642799@N03/sets/72157677749832233/with/32498695293/
